Starting a Sourdough Starter
Making bread from scratch can be the most rewarding of experiences, especially if you’re using your own starter. It means you’re in control of the every single aspect of the bread making process, as it’s been you who’ve raised the starter from its origins of just flour and water, into something which is a living and growing thing.
Your starter will become an extra responsibility in your life, so it’s best to accept that at the offset if you want to get into it. Like a puppy or goldfish – it needs to be fed and watered at regular intervals.
The kind of starter that you should keep depends on the kind of bread you will be making. The best rule to go by is to use the same flour in the starter as you would in the loaf. So if you’re going to be making a lot of rye-based breads, then a rye starter is what you should be keeping. When making white-based loaves, then it’s recommended that you use a starter that’s made with white flour. I’ve included instructions on how to begin and maintain both below.
There’s not a lot you’ll need when starting and maintaining a starter. Some recipes state that you need raisons, rhubarb, or even sugar to help your starter get going. Please don’t add these. What is essential is using great flour. Don’t go to the supermarket and pick up the nearest flour that may have the letters ‘rye’ or ‘white’ on the package. That just won’t do. You won’t get the flavours and yeasts that come with a great flour. What you need is an organic unbleached flour, as this still has the nutrients and microorganisms required to get the starter going.
The flours I use in the following are Redbournbury Organic Unbleached white flour and The Priors Organic Rye flour. Both available from Bakery Bits.
I’ve included below a tried and multiply tested recipe for a rye and white (liquid levain) starters.
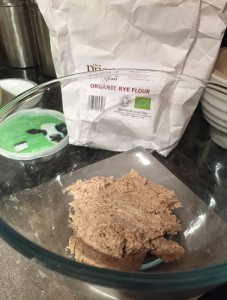
Rye Starter
Day 1 – making the initial sourdough
225g Rye flour
225g water
Mix the flour and water into a paste, and put into an airtight container. Keep it in something like an airing cupboard where the temperature is consistent for 24 hours.
Day 2
125g initial sourdough
125g rye flour
125g water
You should be getting a nutty smell from the initial sourdough mix, which should have also increased in size slightly.
Mix all the ingredients into a small paste, place into an airtight container and leave
Days 3 to 7
125g initial sourdough
125g rye flour
125g water
Mix all the ingredients into a small paste, place into an airtight container and leave in a warm area. You should do two feedings on these days at 12 hour intervals.As the days progress, you should be getting increasingly maturing yeasty and alcohol smells and tastes from the sourdough. This is the yeasts and bacteria settling into their new homes. After about a week it should start to smell ‘right’ and you can start to use it in your loaves.
Daily Maintaining:
5g initial sourdough
80g water
100g organic rye flour
Mix together in a paste, and keep in an airtight container.
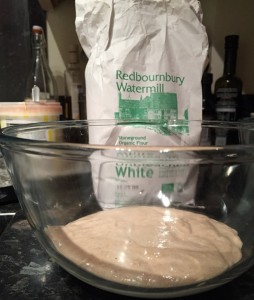
Liquid Levain (White) Starter
Day 1
150g rye flour
187g water
As with the rye sourdough starter, mix the flour and water into a paste, put into an airtight container, and place in a temperature-consistent place.
Day 2 (morning)
100g Day 1’s initial mix
45g Rye
45g White
112g Water
Mix ingredients, and put into an airtight container.
Day 2 (+12 hours)
Repeat the Day 2 morning steps
Days 3-5
100g initial mix
90g white flour
112g water
This should be right to use after the fifth day, although don’t expect it to produce a decent loaf for the first few times you use it.
Daily Maintaining:
For optimal health, it’s best to do the following:
16g initial levain
80g water
80g organic white flour
Mix together in a paste, and keep in an airtight container.


Trackbacks and Pingbacks